[et_pb_section admin_label=”section”] [et_pb_row admin_label=”row”] [et_pb_column type=”4_4″][et_pb_text admin_label=”Text”]
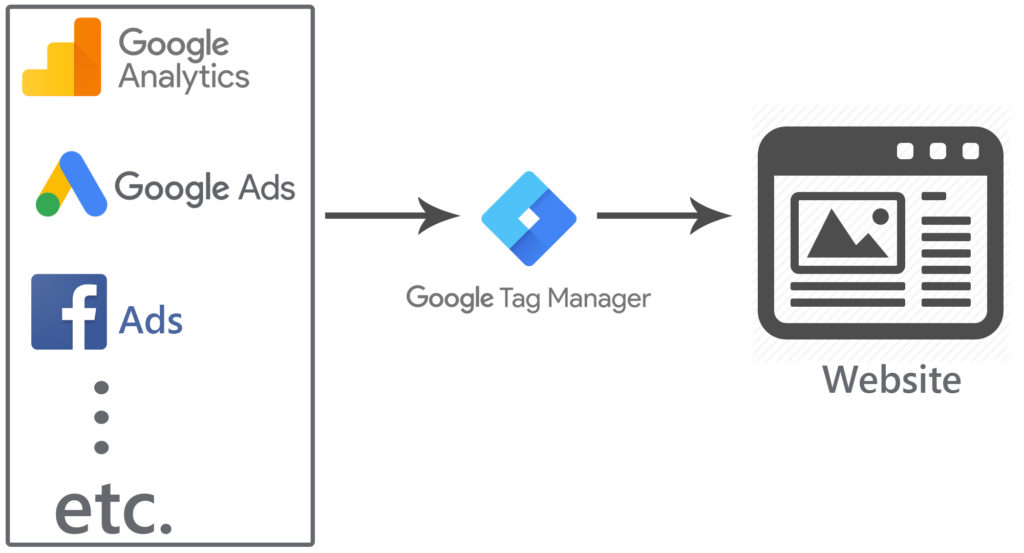
Google tag manager is a free tool which helps marketers to add tags to their website. A tag is basically just a snippet of code that sends data back to the main server (whose tag you are using) with the information about user activity and other measurement metrics.
Adding tags to a website can be a lot of hassle for marketers who are unfamiliar with the code. Google Tag Manager gives them the ability to add tags to their website without even touching the code of the website.
In earlier days when GTM was not there, marketers used to edit site code themselves (if they had that technical skill) or ask web developers to add tags on it. Every time they wanted to add tags to the website, they had to deal with the site code.
GTM gave them the ability to add tags, edit tags or even remove tags from the website without even touching the site code. It removes all the risks associated with messing around with the site code and gives more accurate tag management system.
Explaining Google Tag Manager Code
Google tag manager snippet is a piece of javascript and non javascript code which you need to insert on all pages of your website. It enables Tag Manager to fire tags by inserting gtm.js into the page (or through the use of an iframe when JavaScript isn’t available).
When you create your GTM account and container inside it, you’ll get a code initially with proper instructions. The code is something like this –
GTM Script Code –
<!-- Google Tag Manager -->
<script>(function(w,d,s,l,i){w[l]=w[l]||[];w[l].push({'gtm.start':
new Date().getTime(),event:'gtm.js'});var f=d.getElementsByTagName(s)[0],
j=d.createElement(s),dl=l!='dataLayer'?'&l='+l:'';j.async=true;j.src=
'https://www.googletagmanager.com/gtm.js?id='+i+dl;f.parentNode.insertBefore(j,f);
})(window,document,'script','dataLayer','GTM-XXXX');</script>
<!-- End Google Tag Manager -->
GTM Noscript Code –
<!-- Google Tag Manager (noscript) -->
<noscript><iframe src="https://www.googletagmanager.com/ns.html?id=GTM-XXXX"
height="0" width="0" style="display:none;visibility:hidden"></iframe></noscript>
<!-- End Google Tag Manager (noscript) -->
In the code above, GTM-XXXX is your Google Tag Manager ID. It will be a unique number for your GTM account.
What are Tags, Triggers and Variables in Google Tag Manager
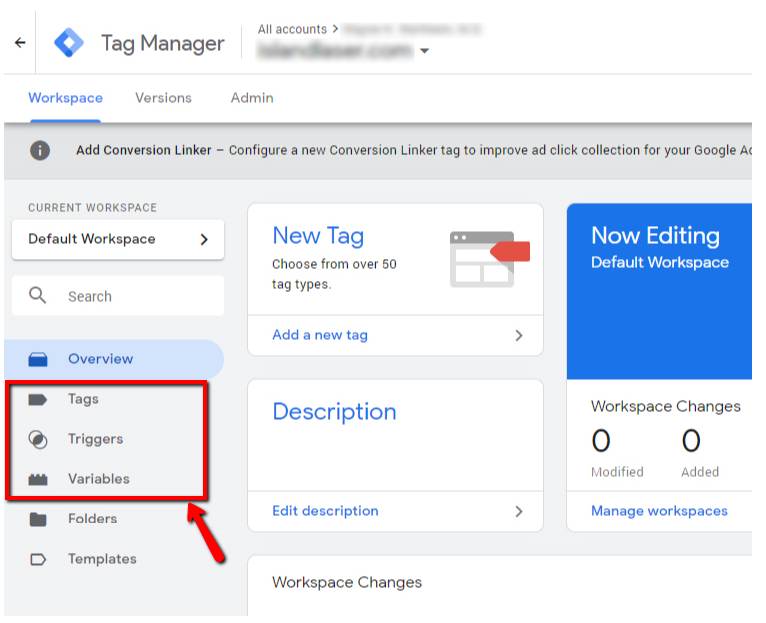
When you look into the workspace page of GTM, you will come across a few sections on the left-hand side – Tags, Triggers and Variables. These 3 are considered as the building blocks of Google Tag Manager.
Tags: A tag is a snippet of code that runs on a web page or mobile app. Tags can be used for many purposes but mainly they are used to track user activity and send measurement data back to the site (whose tag you are using).
Triggers: Triggers tell us when a tag should fire. Firing means running in Google Tag Manager terms. So in triggers we set rules to tell GTM when a tag is supposed to fire or a web page and when it is not.
Variables: Variables are used to hold values. They are used both in triggers and tags to filter when a specific tag should fire.
What is Data Layer in Google Tag Manager
Data layer is a kind of temporary place to store values of your site. It can store anything like page URL, page title, user id, transaction values etc.
In more technical terms we can say that it’s a javascript object in which we can put information regarding your site whatever we want to send to GTM. Then we use GTM to pick those values from data layer.
Creating a simple tag in Google Tag Manager
Here I will show you an example how you can deploy a tag on your website with the help of Google tag manager.
First of all create Google tag manager account, then create a container inside it for your website and choose web as content type. After that install the GTM code snippets on your website. You can see the steps in this video.
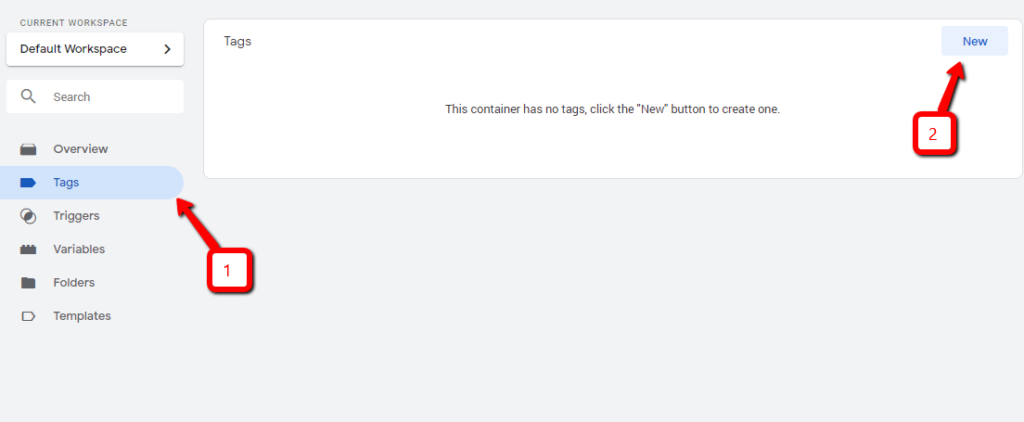
Now we’ll just create a dummy tag on your website. Click on tags on the left hand corner of GTM account and then click on new to create new tag.
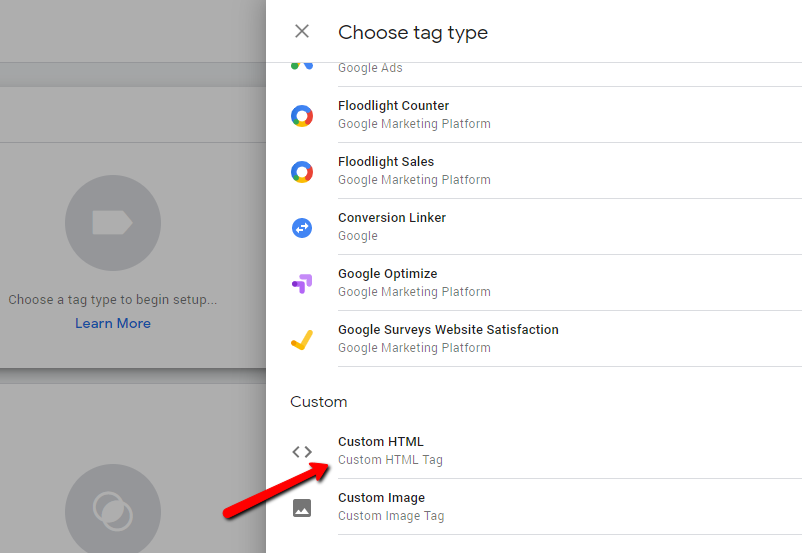
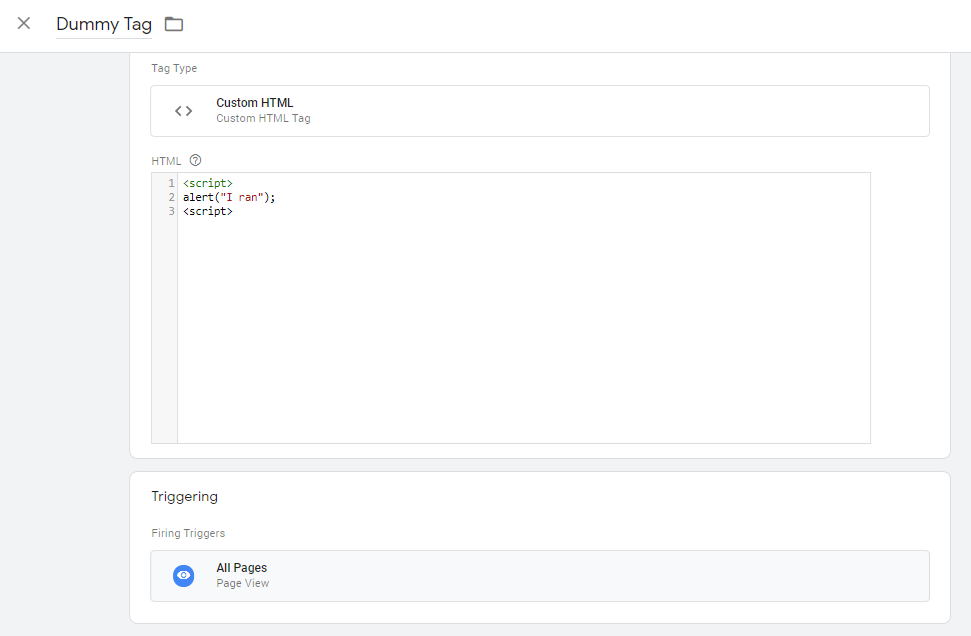
You can name it a “Dummy Tag” by clicking on the “Untitled Tag” on top left corner. Then click tag configuration select custom HTML as tag type.
Then copy/paste the below mentioned code in the html box
<script>
alert("I ran");
</script>
After that click on the triggering section below it and select all pages.
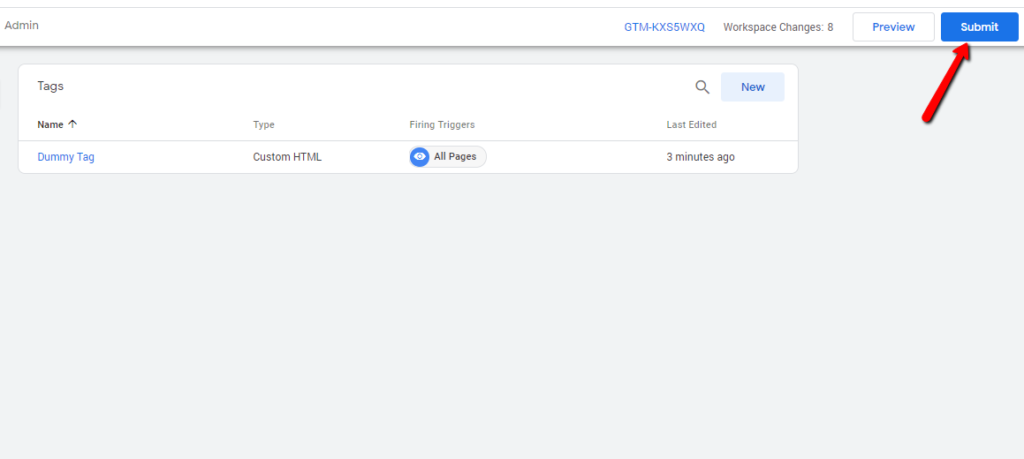
Then click on save on top right corner to save the tag. Then click on submit to finally publish your changes and implement that tag on your website. You can leave container descriptions and other information it asks while publishing the tag.
Now open your website in another tab of the web browser. You’ll see a pop up message saying “I ran”. This means that our tag is successfully deployed by GTM and is running on our website.
What is Google Tag Manager Console
In the above example we just published our tag after creating it and saw the code running on our site with that pop up message. In a real world scenario not every tag which runs on our website is supposed to give us that pop-up message.
So how do we check that our tag is running properly on the site or not. The answer is through GTM console.
Now in the above example, edit your Dummy Tag and replace the code in HTML with following code which does not gives any pop up message when it runs.
<script>
console.log("I ran");
</script>
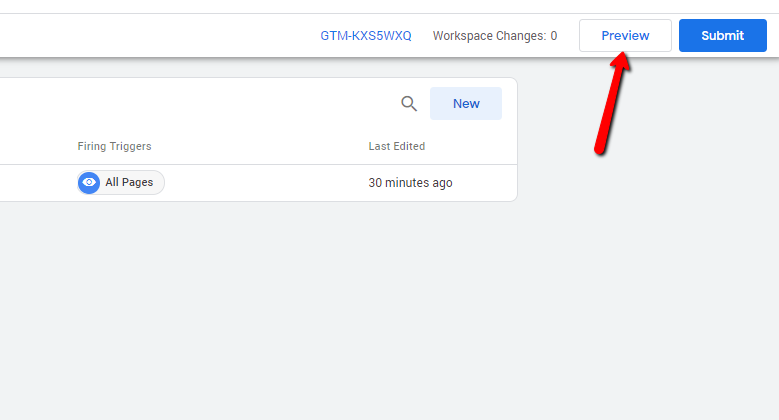
Then save the tag and enable GTM console on the site by clicking on the Preview mode on the top right corner.
Once preview mode is enabled in GTM we can refresh our web page again in another tab (in same browser) and we’ll see GTM console at the bottom of the web page.
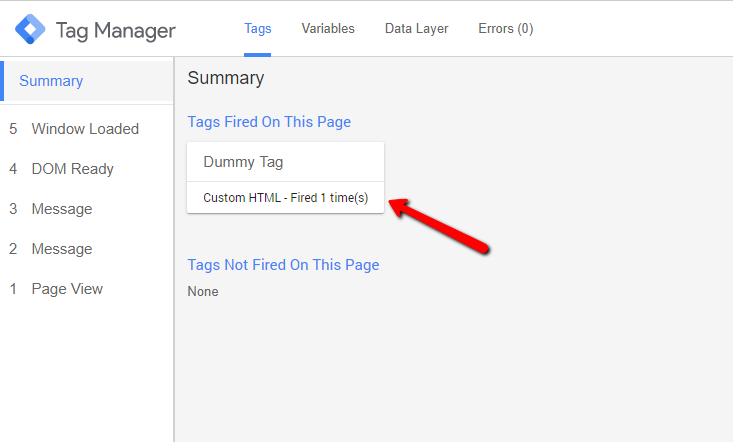
Under “Tags fired on this page” we’ll see the tag that our tag is properly firing on the page.
Conclusion: In this post I explained the basic functionality of Google Tag Manager and it’s various components. We tried to understand this with a an example of simple tag creation. But there is lot more to do with Google Tag Manager than this.
[/et_pb_text][/et_pb_column] [/et_pb_row] [/et_pb_section]