
Google analytics has proved itself as the number one tool in the game of digital analytics. But, if you are a big company then a significant amount of your traffic is from your company’s employees only. Those visits should not be counted because, simply, they are irrelevant to your concern.
But how would you remove that? Sometimes, you are just focusing on a special domain name that you might or might not want visits from. You can do that and much more with google analytics filters.
Google Analytics filters refine your data in a way that it becomes much easier for you to identify data, data patterns, etc. It specifies data in your selected filter so that data coming to you is readily understandable.
You need to follow a series of simple steps in order to use these filters. But first, there are things that you need to understand before you dive in them.
How filters work inside Google Analytics
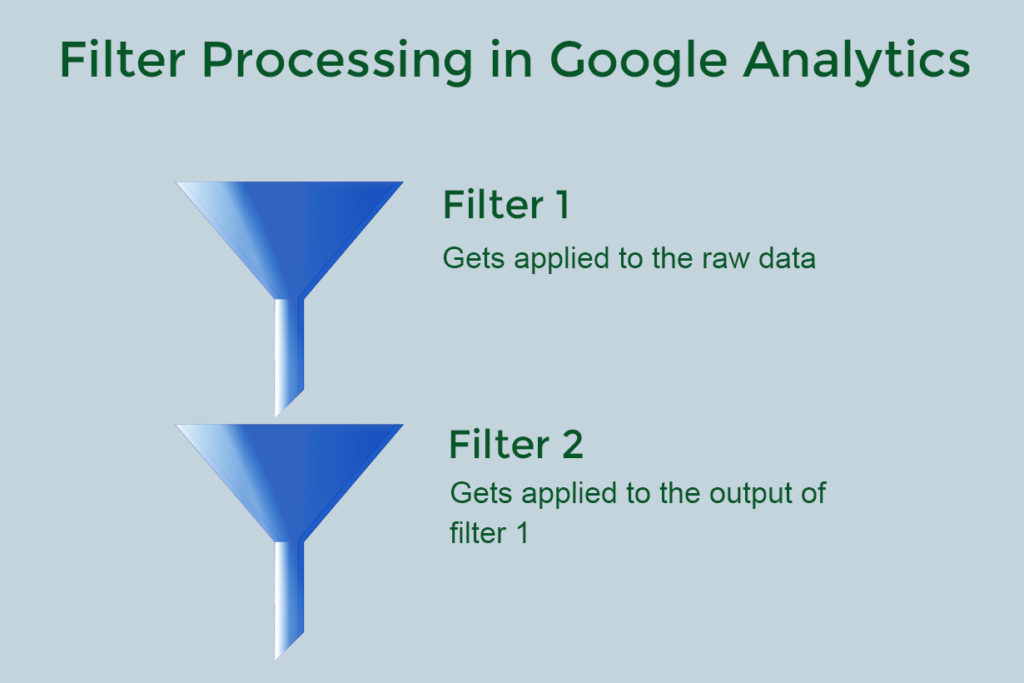
When a filter is created inside a Google Analytics view, it is immediately applied to the raw data coming to that view. The filters that you apply will have permanent effects on your data that means they can’t be reversed or undone.
You can also apply multiple filters but always remember that filters work in a sequential manner. That means the output of the first filter you applied will serve as an input to the next filter.
It is also advised to use filter verification just in case you want a preview of filters before you apply them.
As we can’t reprocess the old data once it passes through a filter, it is highly recommended that you keep the raw data intact by not applying any filters to your master view. Create a another view for applying filters.
There are some recommended views in Google analytics which we should always create before applying filters, so let’s talk more about them.
What are recommended views in Google Analytics
Before applying filters you need to make 3 reporting views in your account. First, understand that what are these reporting views and why do we need them.
A reporting view, as the name suggests, provides you with a specific kind of report on your data. Here, the data will be the same, only their reporting styles will differ.
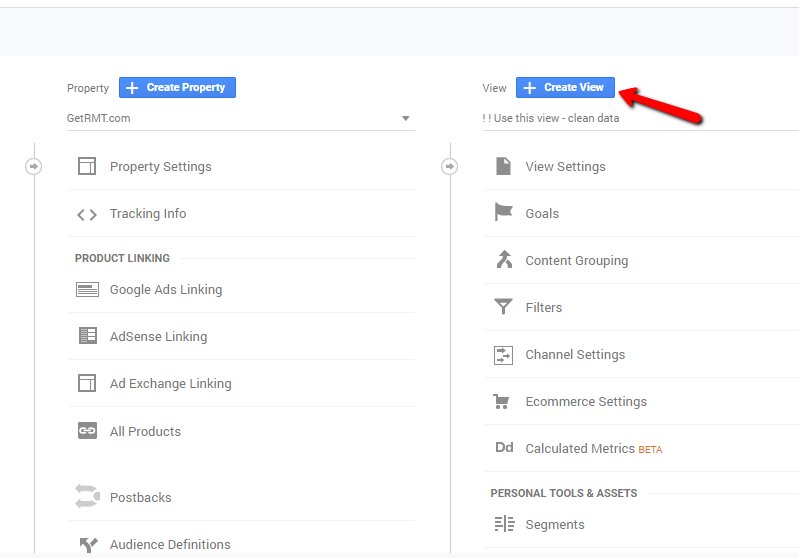
These Views can be created by clicking on “Admin” section of your Google Analytics account seen at bottom left corner and then clicking “create view” under view column.
Following are the views that you must create inside your Google Analytics account:
1. The raw report view: Here, all the data is added without any filters. That is, it is a collection of the raw data that contains everything and can be used as a backup.
2. The primary report view: This one creates various filters that you apply to sort the data the way you want. This is the report which you’ll be needing for your work.
3. The test report view: This one is just a test view where you test your account after you have applied any filters.
The raw report view is the default view (master view) which automatically gets created once you create your analytics account. You just need to create two other views after that.
So, now let’s talk about how to create filters in those views.
How do you create filters inside Google Analytics
Here are the steps to apply filters:
1. Login to your Google Analytics account and select the test report view. This is because, as discussed, the raw report view is a backup and we should not mess with it. We should first create filters in test report view and once they work fine on test view, we can apply them to our primary report view.
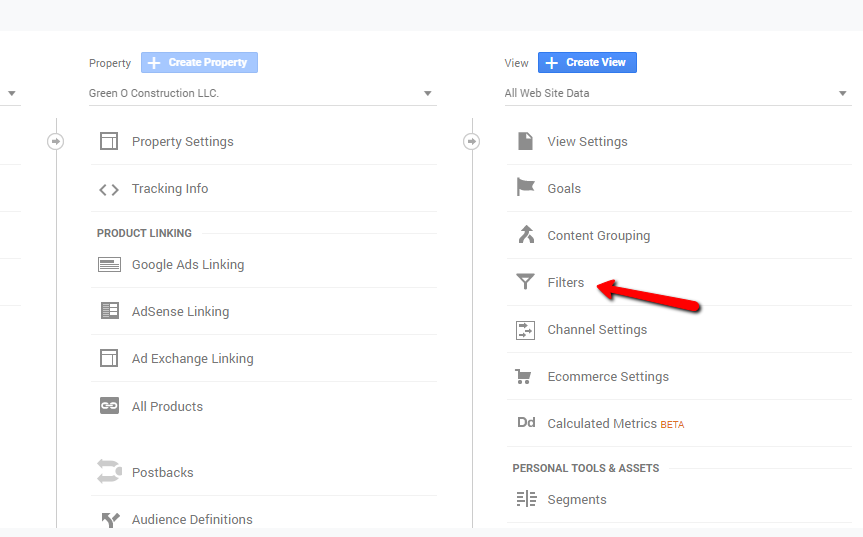
2. Now, click on the admin section on bottom left corner, look for “Filters” under view column and click on it.
3. Click on the “+ ADD FILTER”, this is how you add a filter.
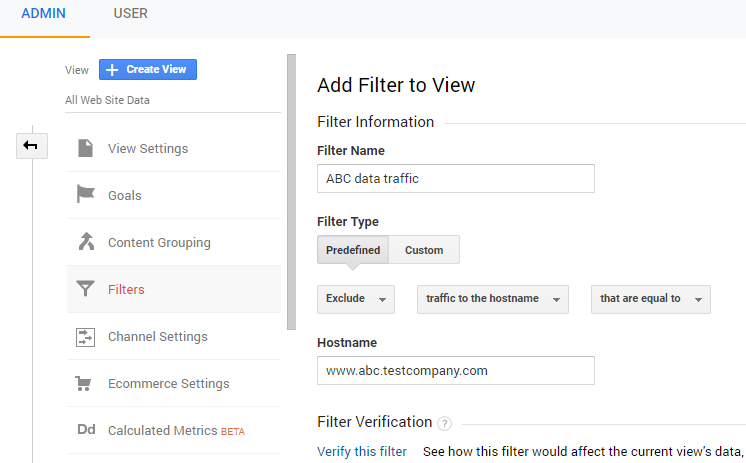
4. Enter the filter name. For example, if you are filtering a specific domain data then enter “ABC data traffic”.
5. Select the type of filter as predefined or custom based on your needs.
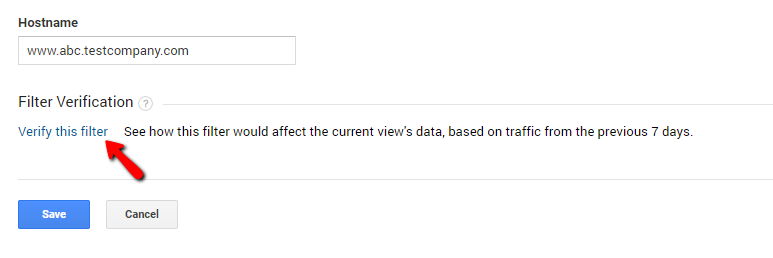
6. Fill in the other details by taking an idea from the following example: |exclude ||traffic to hostnames||that is equal to| [www.abc.testcompany.com].
You can use filter verification here to get a preview of the filter. This can be done from just above the “save” button at the bottom. You can see a Filter Verification call there. Please click the “Verify this filter” option, it will be available in blue color.
What types of filters you can create in Google Analytics
You can create custom filters or you can create filters based upon pre-defined templates. But when you create a pre-defined filter, you can choose to exclude or include traffic based on:
- ISP domain – allows you to filter based on the domain of your ISP (Internet Service Provider). This is only useful if you’re with a larger organization which has its own dedicated internet.
- IP addresses – you can filter data using IP address but most of the internet providers give you dynamic IP addresses which can change. So first ensure that you have a static IP address before you filter data using IP addresses.
- Sub-directories – you can use this template to only include or exclude traffic from your website’s sub-folders. For example, if you wanted a reporting view that only contained traffic to your blog page https://dataacts.com/blog/ sub-folder, then you can enter /blog/ into the template.
- Hostname – allows you to include or exclude) traffic based on domain name. If you have your analytics code installed on two domains then you can specify a domain for which you want to see data.
Custom filters provide greater flexibility, allowing you to:
- Exclude data
- Include data
- Change data to lowercase
- Change data to uppercase
- Search and replace
- Create an advanced filter to modify data
Custom filters are more advanced and require knowledge of regular expressions. With regular expressions (regex) you can create any custom combination to include or exclude particular type of data from your data stream flowing into Analytics.
Conclusion: This was about the Google Analytics Filters. We learned about the filter processing and the reporting views. We also learned about the smart hack of “Filter Verification”. For more information/next article stay tuned.